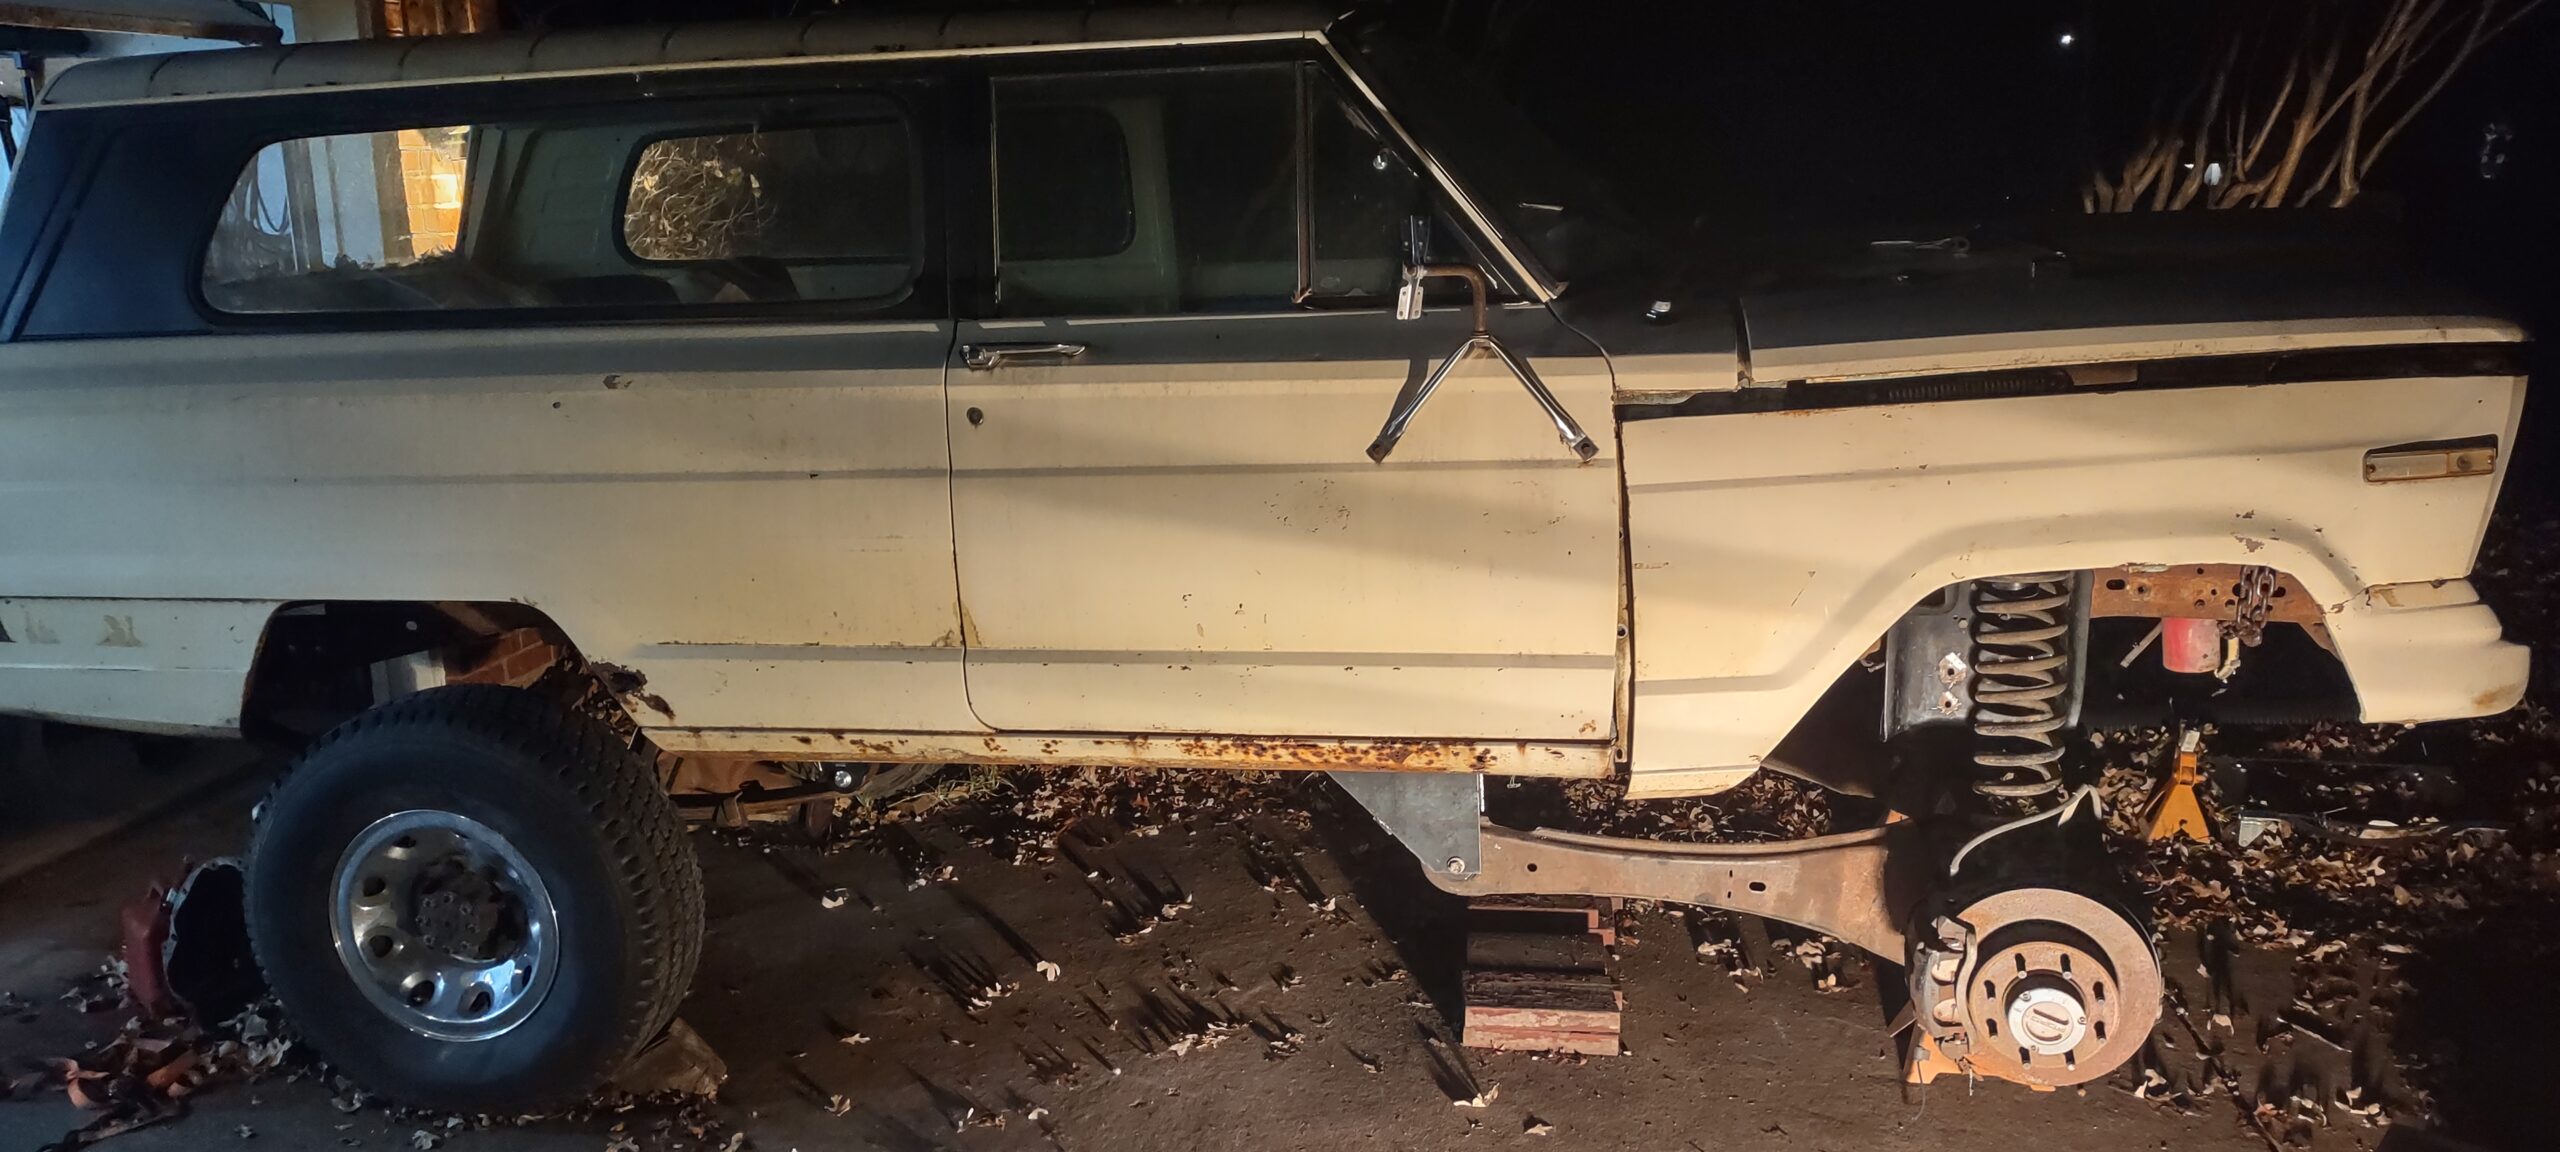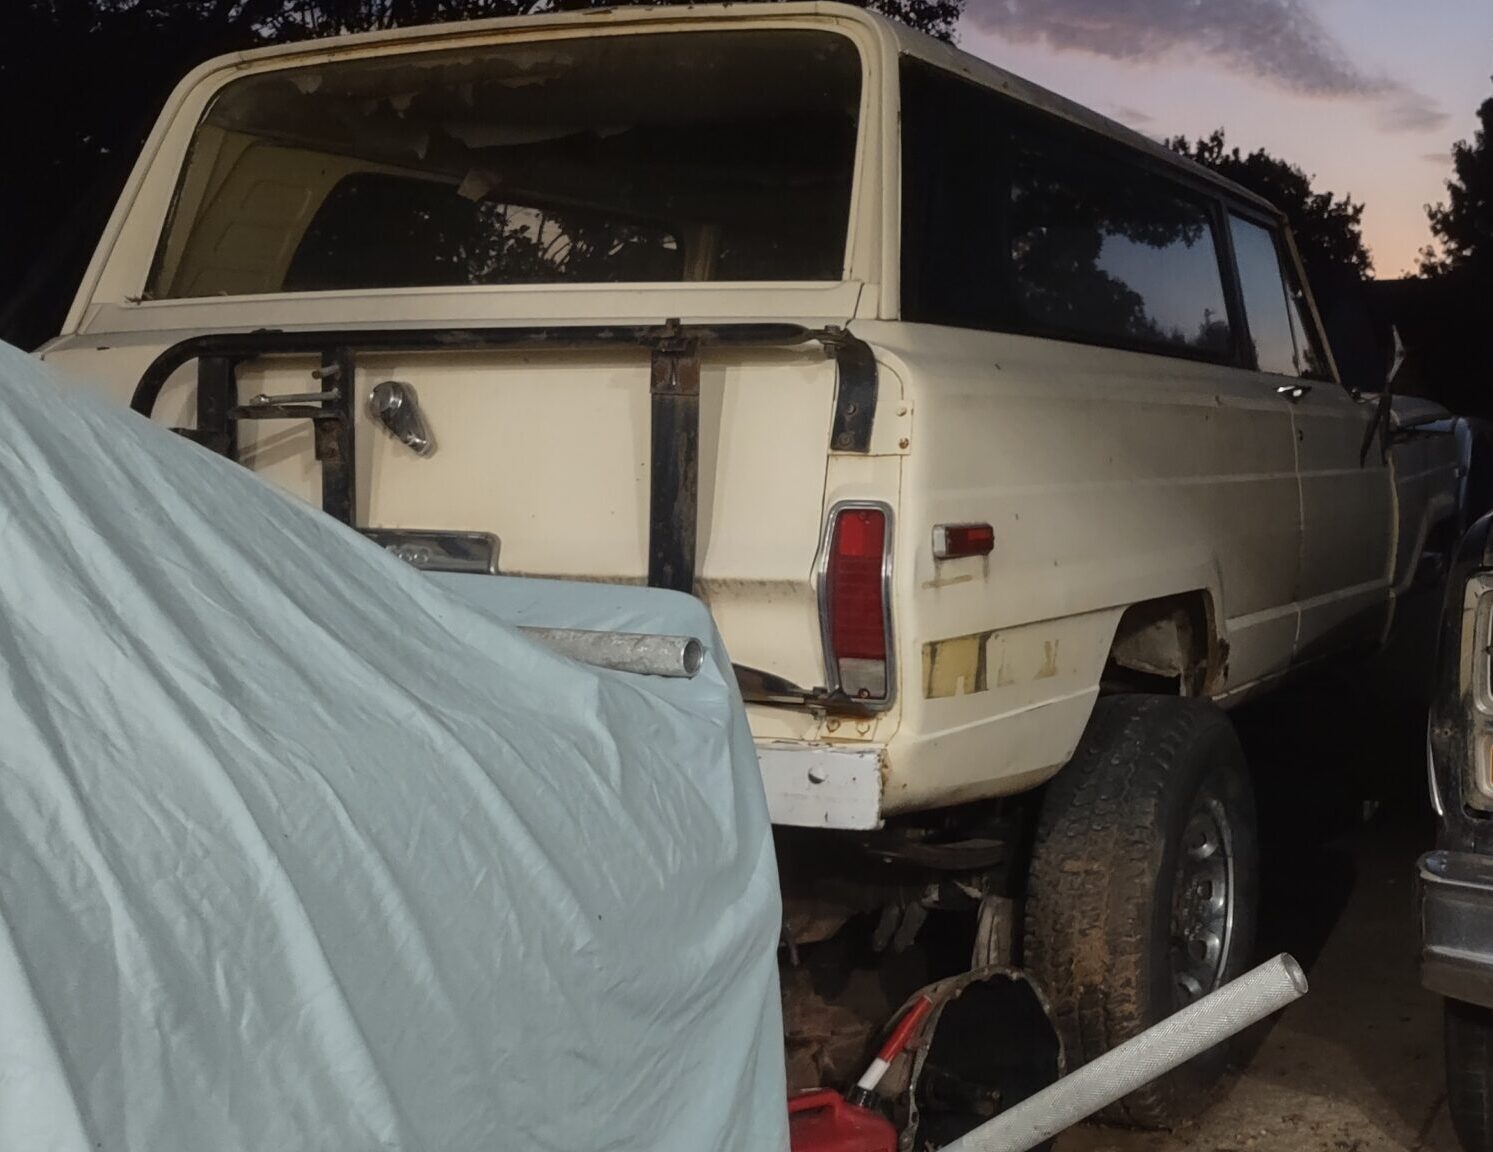
There have been lots of updates this winter break however less than what I had hoped for. I am going to try to find a way to put everything succinctly.
Starter
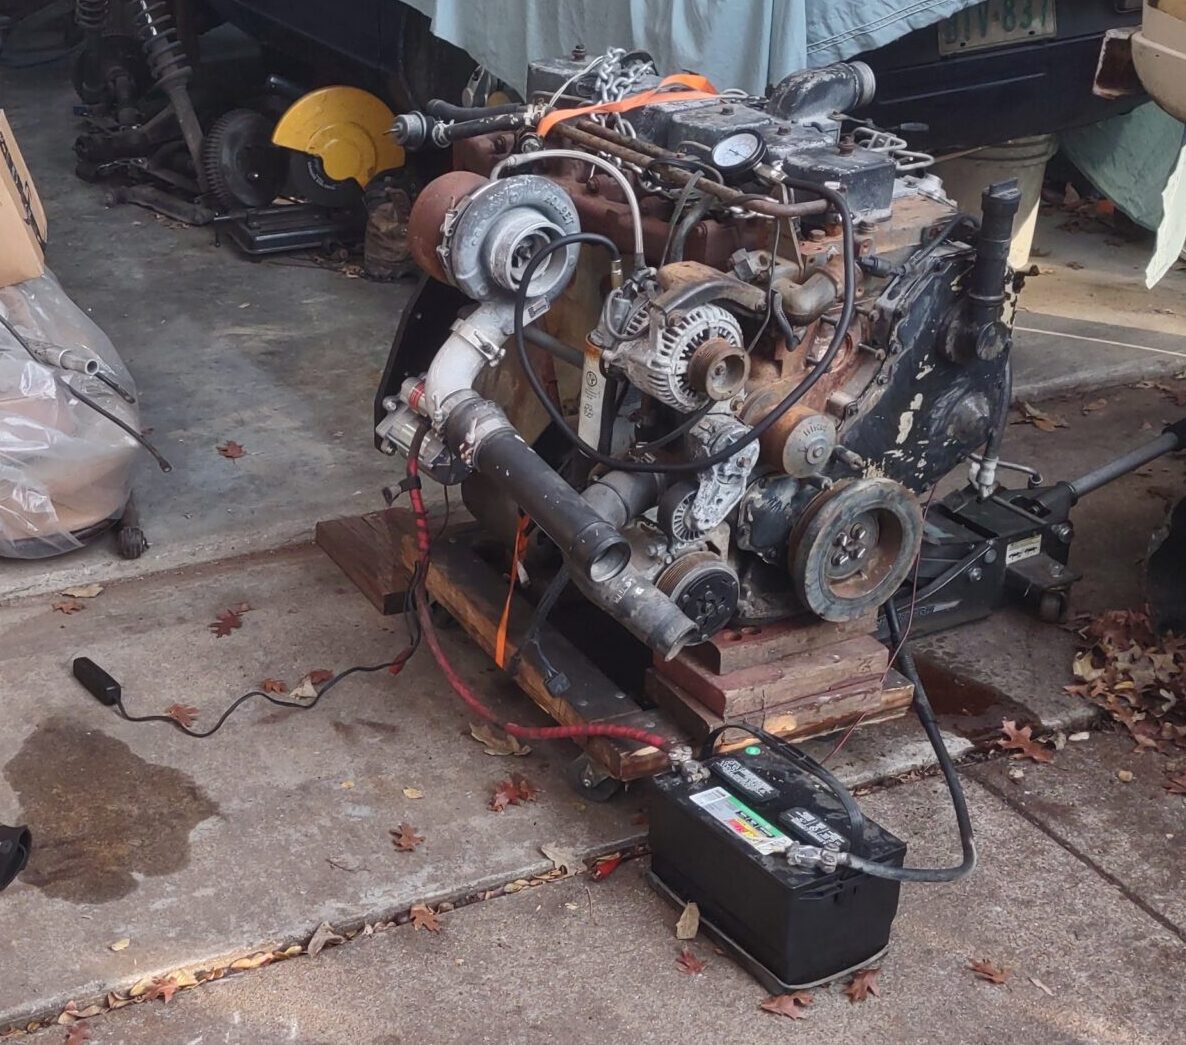
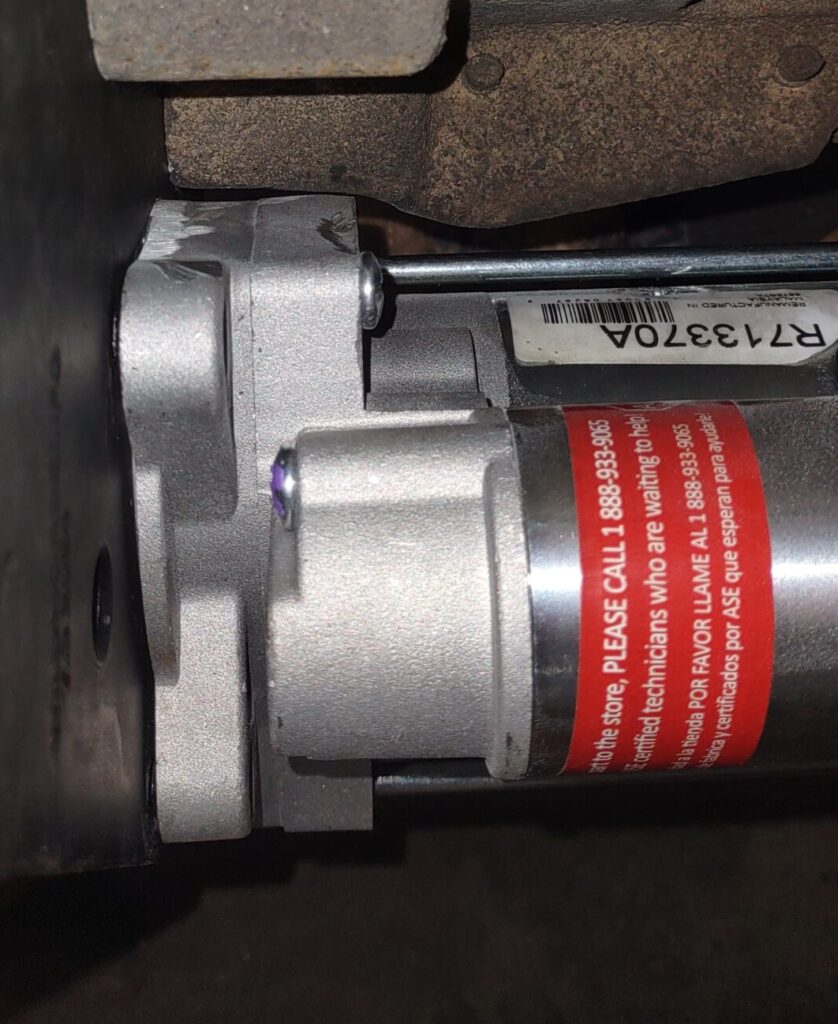
Working with the adapter plate didn’t yield anything conclusive. They offered to refund me and even let me try one of their friends adapters from a different company but the problem is such that I couldn’t imagine other adapter plates resolving this issue. There’s just not a lot of room to avoid the bellhousing. It was evident I was going to have to figure it out myself. Before I started cutting my way through I decided to go to the parts store to see the three different Power Stroke starters myself. The differences are subtle but there did seem to be some on the front cone. I purchased the 6.4L Powerstroke starter to test fitment and kept my 6.7L starter just in case. The 6.7 starter is better and ironically cheaper. From left to right; 6.0, 6.4, 6.7
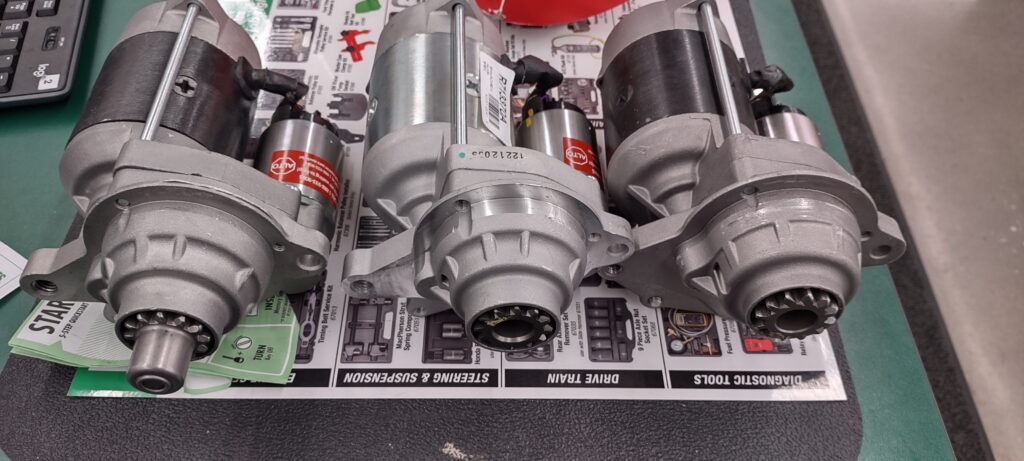
As I stated in my prior post, the adapter plate website lists using all three of these, in different locations on the site, so it was unclear which was true. So, I can’t say they were wrong since they listed all possible answers… Turns out, the right answer is the 6.4L starter. I emailed them my findings to no response. For anyone who is reading, if you plan to mate a ZF6 to a 12 Valve 6BT, nearly all the adapters have the same starter location. You will have the same problem. 6.4 starter is your answer unless you want to trim the bellhousing. Trimming the bellhousing won’t compromise the structure but will destroy your trade in core value. Also, the 6.4 has a bigger bolt which clears the hardware provided. Fitment to the trimmed block was great.
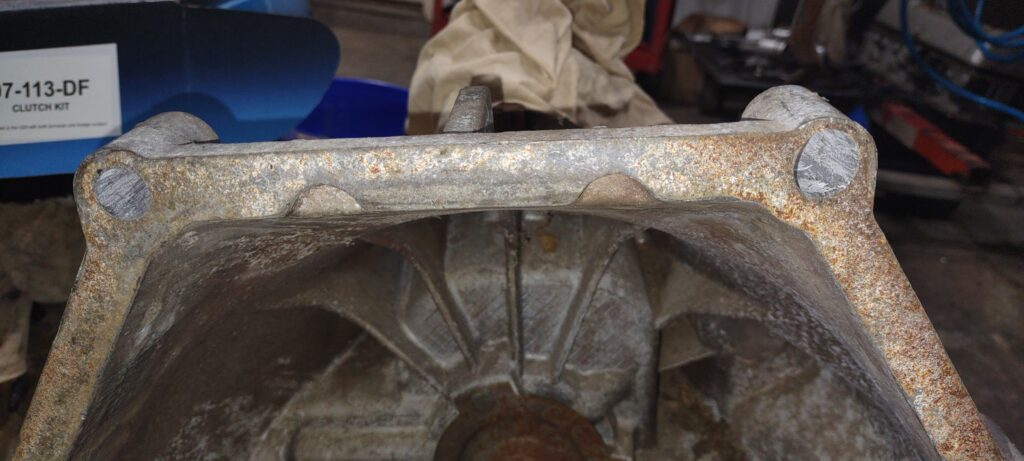
There was also an issue with fitment of the adapter to the bellhousing. This part still gets under my skin. The machines used to manufacture these adapters should be able to hold tolerance. I heard nothing but “I like my products to hold tight tolerance but I guess it could have shifted”. No one does simple quality control, like trying to bolt their product to a bellhousing or pattern of one? I had to oval out the top two holes, one more than the other, by about 1/8″.
Engine
Short version: after getting a starter that actually fits I went to test run the motor on the ground. I read up on what all is required, being my first diesel. Motor fired up and produced 50-80PSI. I checked blow-by by putting the oil cap loosely on and it did not blow off – a shade tree mechanic way of testing if there is “a lot” of blow-by. I’ll post a short video.

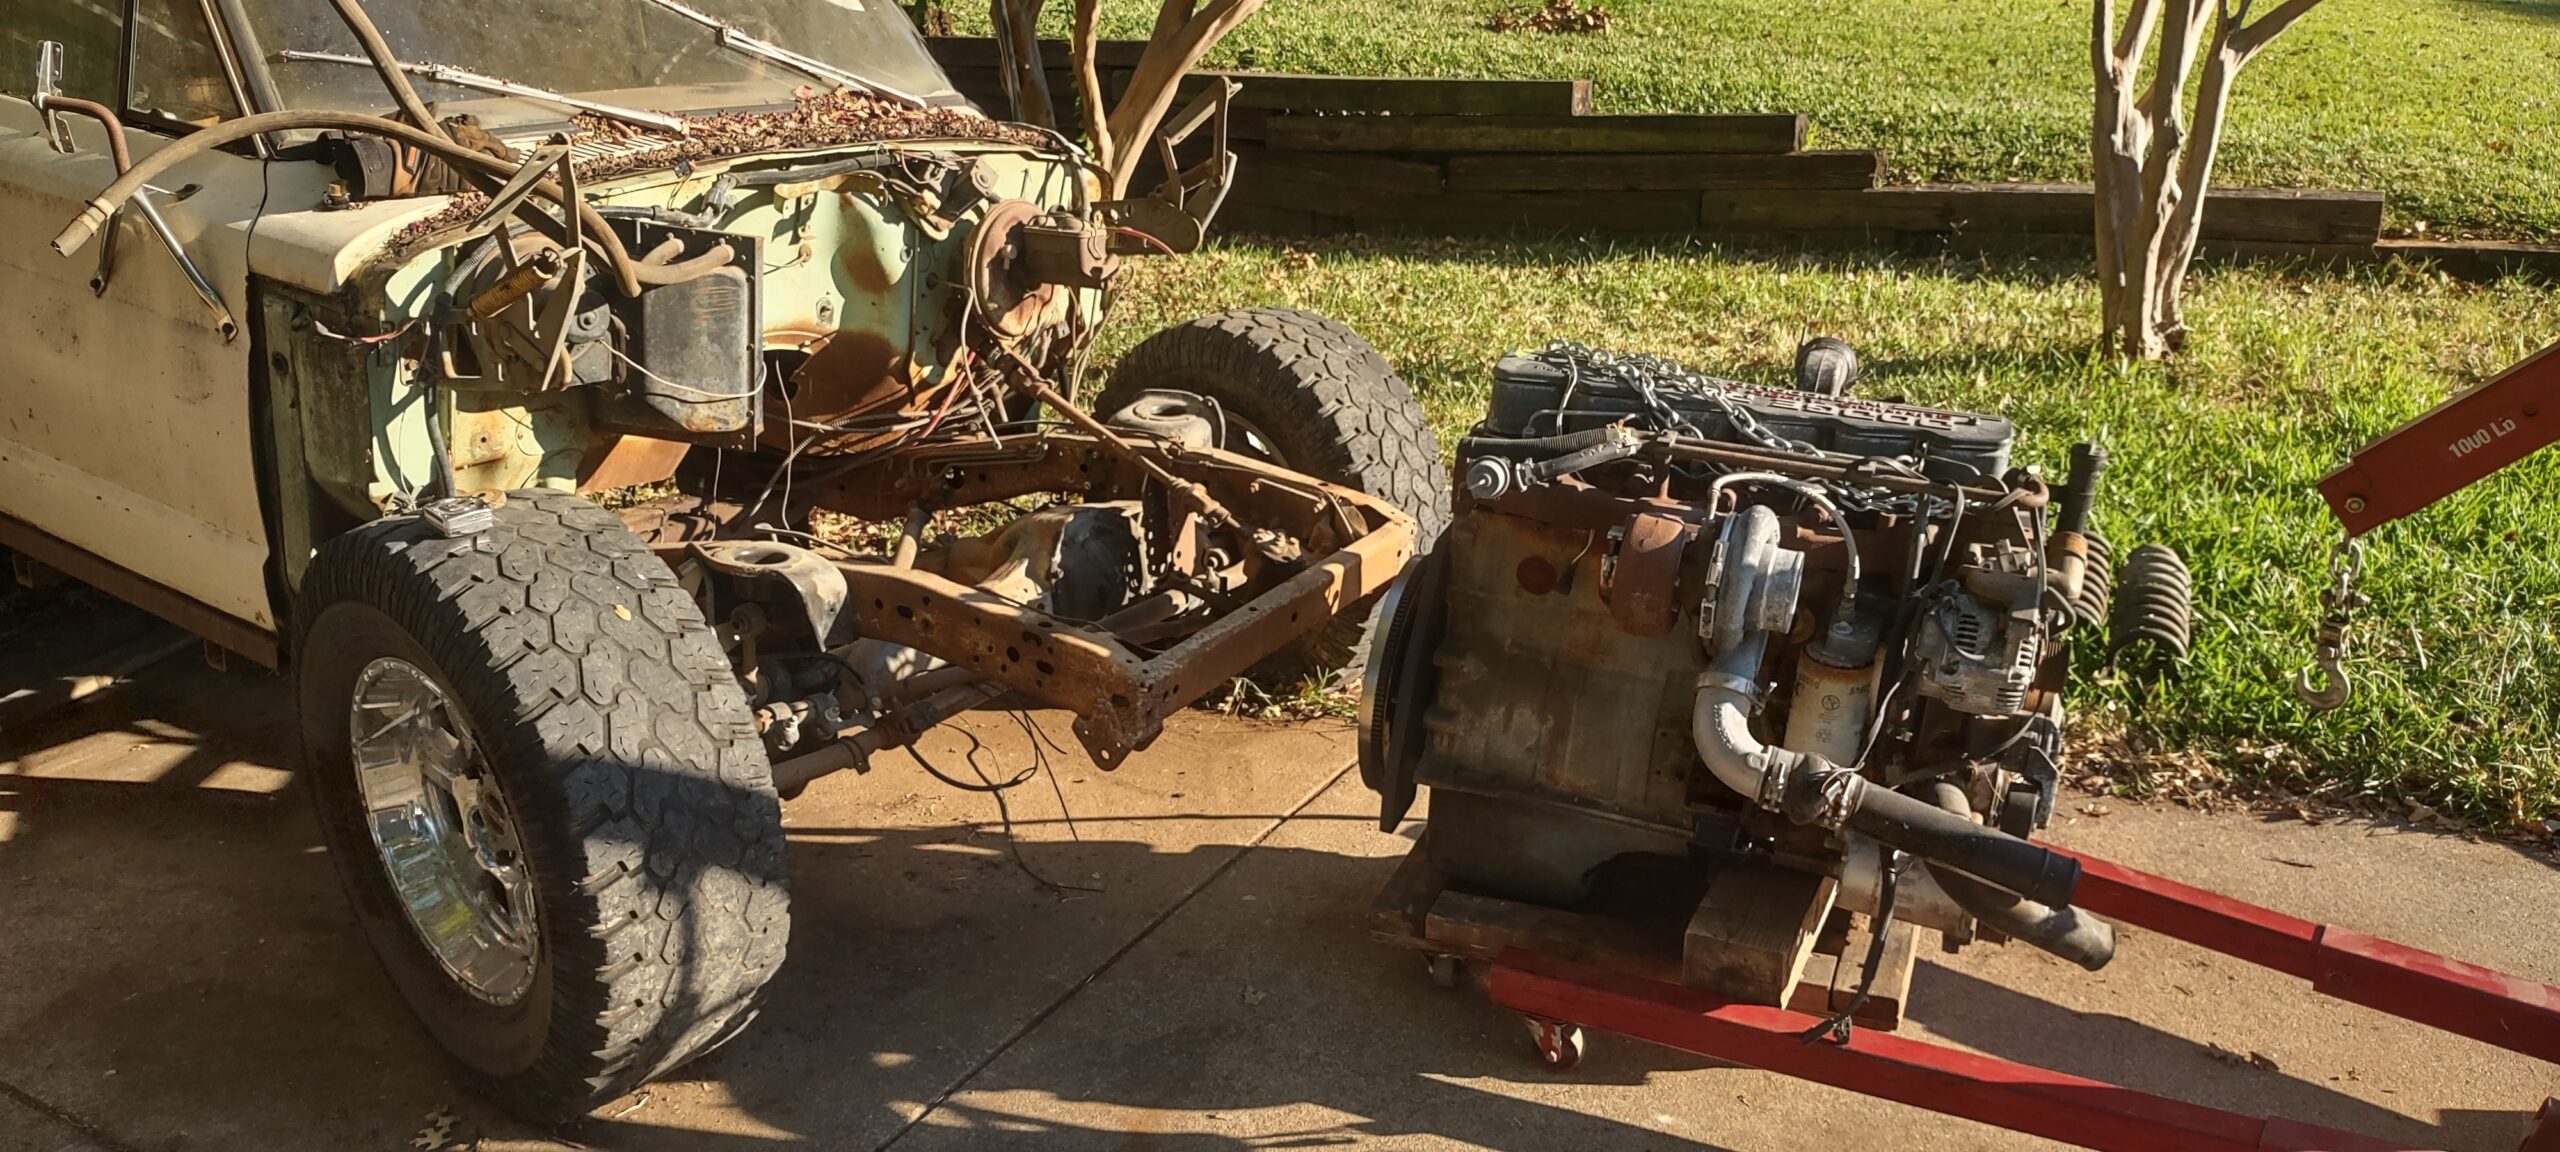
Engine Fitment
In my previous post I welded in the engine cross member ends. I marked on the frame where the slots should be and also accounted for axle movement (hoping the cross member misses the axle) and the track bar. When I put the motor in for the final time it seemed to fit differently than I had it before. Rinse and repeat. I probably put the motor in 10 times before I left it in. I was and still am very perplexed. Why was it fitting differently each install? I think it came down to the motor mounts having slots and those slots are not a very positive mounting point that maintains position in the frame. I was so burned out, I honestly hadn’t tried every combination, because there were a few more elephants in the room. I was looking at other installs using a 1st Gen Dodge cross member and everyone seemed to be shifted closer to the driver side. I was also mysteriously 4.5″ from the firewall.
During my multiple test fitments in my previous post (I swear, I test fit this thing several times before welding), I was less than an inch, which is what is needed. My best guess is the engine was tilting too far rearward. I knew it was going to be an issue. At the time the front of the Jeep was raked because I had pulled the springs out, but the engine was level, creating what I guestimated to be 8-9°. This would reduce the clearance at the top where I was looking.
Looking at some photos of the cross member online (remember, I received the cut off ends, not the entire piece), the cross member didn’t look symmetrical. Then I realized I installed my cross member backwards compared to everyone else. At this point I couldn’t say why or how that happened. I horsed around with how to best fit them, I am sure I had reasons – namely that the asymmetry I was spotting was to accommodate a passenger side differential housing a Dodge but I have a drivers side housing with the Ford axle so it would make sense to switch the ends. There were so many variables at play and after several days of swapping pieces and measuring I had enough. I cut out the cross member I just welded and flipped it around. In between there I had cut another set of slots to push the motor back so while the cross member was out I welded those closed.

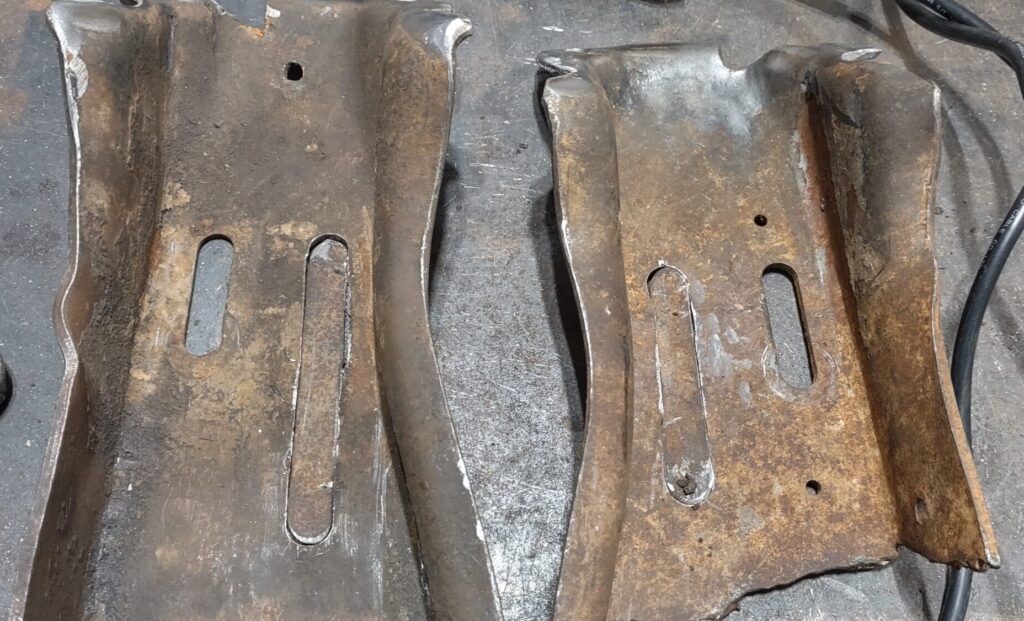
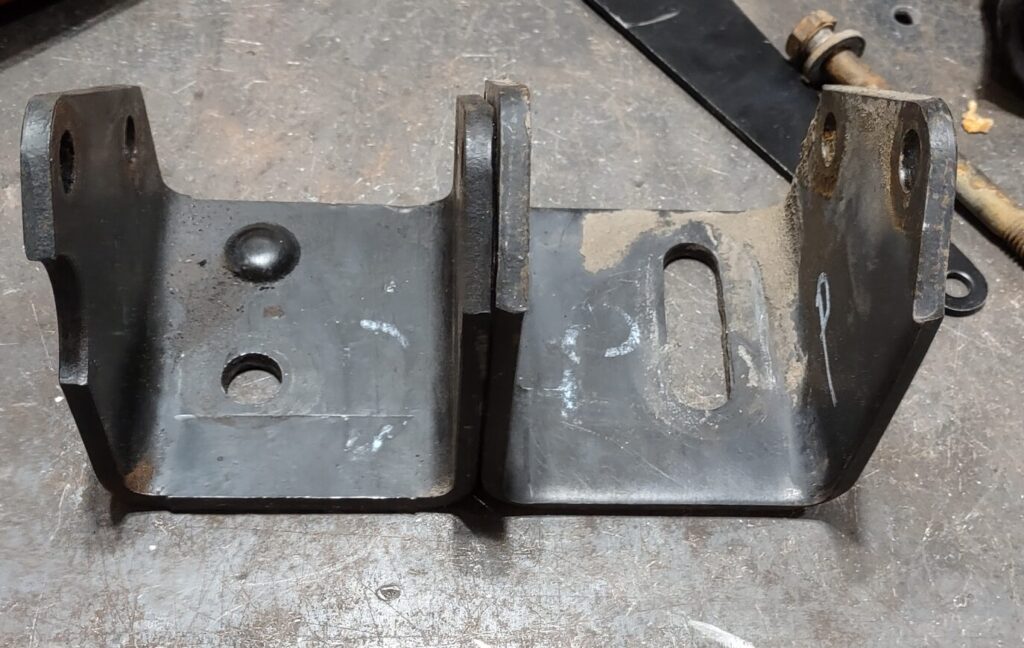
These are u-brackets that bolt to the motor. The order goes motor, u-bracket, rubber motor mount, cross member. Even these u-brackets had mystery behind them. One has a hole, the other a slot. The one with a hole has a dimple to accommodate the locating pin on the motor mount and yet this locating pin goes down towards the slot on the cross member (both sides have slots in that respect). The one with the hole also has a notch for the power steering pump. They have separate part numbers and per the parts manual, the slotted u-bracket is the passenger side. And yet, there are resources out there that say otherwise. They say the version with the hole is the passenger side. I even saw a forum post saying one side is longer than the other. My observations didn’t corroborate any of this and it added a significant amount of noise to problem.
For anyone who is doing this, I highly recommend referencing this Bring a Trailer listing. The seller did the same swap and did a fantastic job. I use it as a primary reference. Due to the amount of different things I have tried, the frustration, I am just going to cut to the chase and say I finally got it in and am happy. Was it necessary to cut out the work I did earlier? I have no idea and it’s water under the bridge now. Keep in mind that my placement has to work with the through-bolts for the coil spring buckets so the new slot location is what it is. Things are very tight near the firewall if I use the rubber engine mounts how they are intended to be used. There is a bolt and a locating pin going out the backside, another out the front side, they are in line with each other horizontally looking top down. Looking at them from the side, they are vertically offset. Google it or check it out here. To gain myself some some distance from the firewall I rotated the engine mounts to take advantage of this offset. This gave me the perfect spacing, it gave me more room on the exhaust-firewall side, it centered the motor… kind of. These slots allow the motor to rotate slightly and I have found that having not one but two slots (cross member and u-bracket), there is a ton of adjustment. I don’t like this because I know I am not going to remember to set that years down the line. Instead, I may weld a washer onto the u-bracket that has the slot to force the bolt into a correct location. This will at least remove some of the variability. I measure my center by measuring the angle of the motor relative to the frame but also if the centerline of the crankshaft is centered between the frame rails. You can imagine by clocking the motor one way or another it will shift the centerline either direction.
I will get some pictures later on. This essentially ate into my entire winter break and I am not thrilled. In fact, I am happy to go back to work. It’s been 3 weeks of total brain saturation trying to deal with this it has become overwhelming. I need a mental break from the project and come back with a fresh mind. I have become very wrapped around the axle on some of the future work and how it will all come together. I need to remind myself of the minimal viable product and that I am at a phase where it’s just get the vehicle on the road. This is taking too long. Do whatever needs to be done to get this vehicle operational. Circle back polishing up details later. What I am alluding to is that getting the motor in is a great milestone but its like passing a pre-requisite class; it opened the flood gate for much more to come where things can get complicated. I will probably cover those things later.